WISE controller provides Timer for timing functions. It also provides Timer Timeout function for condition evaluations. With the timer function, the users are able to edit logic that requires timing approach. In addition, the timer function can be reseted/started in real time that increases flexibility when performing logic control.
Timer Setting
- WISE-71xx, 72xx, 75xx, 790x
- WISE-580x
- WISE-284x, 52xx, 224x
The timer setting page is shown as below:
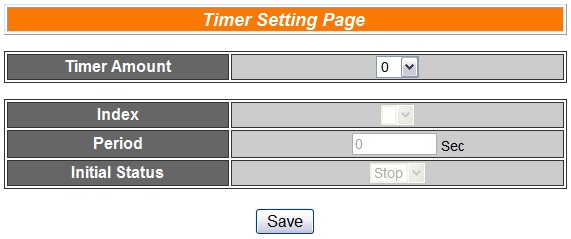
Follow the following steps:
“Timer Amount” field is required. Select the total number of timer you are going to use from the dropdown list.
Specify the timer you want to set up by selecting its index number from the dropdown list of the “Index” field.
“Period” field is required for each timer; please input the period interval in units of seconds. The range of period is between 1 and 65535.
Specify the initial status of each timer from the dropdown list of the “Initial Status” field. Select “Start” indicates the timer will start to count as soon as the hardware device is power up. “Stop” indicates the Timer will remain off when the hardware device is power up; it will not be activated until being triggered under certain conditions. The default setting of initial Status is “Stop”.
Repeat steps 2 ~ 4. After all timer settings are completed, click “Save” button to save the changes.
The timer setting page is shown as below:
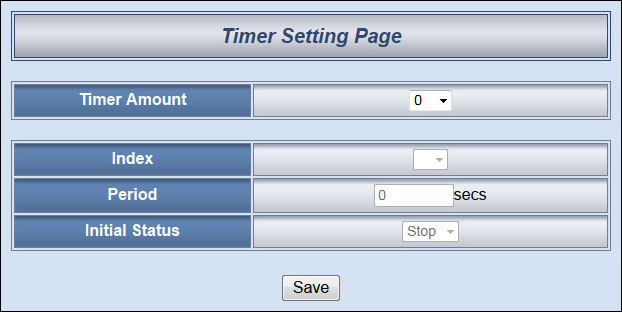
Follow the following steps:
“Timer Amount” field is required. Select the total number of timer you are going to use from the dropdown list.
Specify the timer you want to set up by selecting its index number from the dropdown list of the “Index” field.
“Period” field is required for each timer; please input the period interval in units of seconds.
Specify the initial status of each timer from the dropdown list of the “Initial Status” field. Select “Start” indicates the timer will start to count as soon as the hardware device is power up. “Stop” indicates the Timer will remain off when the hardware device is power up; it will not be activated until being triggered under certain conditions. The default setting of initial Status is “Stop”.
Repeat steps 2 ~ 4. After all timer settings are completed, click “Save” button to save the changes.
The Timer setting page is shown as below:
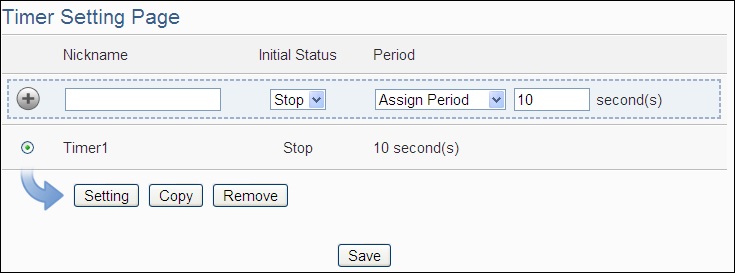
Follow the following steps:
Input the nickname of the timer in the “Nickname” field.
Specify the initial status of the timer from the dropdown list of the “Initial Status” field. The “Initial Status” could be “Stop” or “Start” status.
Specify the period interval in units of seconds. There are two options to setup the period interval:
- Assign Period: Input the period interval in units of seconds manually.
- Internal Register: Assign the period interval as the value of the selected Internal Register.
Click
 button to create a new Timer, and add to the Timer list.
Repeat steps 1 ~ 4 to complete settings of all Timers, click “Save” button to save the changes.
Timer Rule Setting
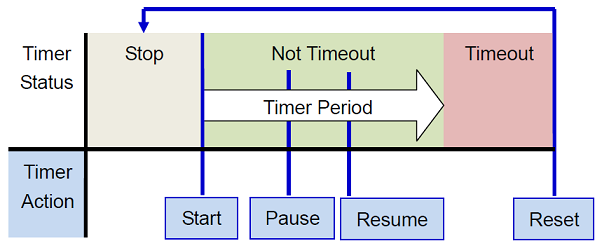
The Timer status can be “Stop”, “Not Timeout” or “Timeout”. They can be included in the IF Condition statements. The Timer Action can be “Start”, “Reset”, “Pause” or “Resume”. The Start Action will start to run the Timer and if the Start Action is triggered one more time when the Timer is running, the Timer will restart again. The Reset action will reset the Timer and stop running the Timer. The “Pause” action will pause the Timer counting temporarily. The “Resume” action is to let the Timer to leave the “Pause” mode, and continue the Timer counting for the rest second of the Timer.
Timer Condition:
Timer Action:
Timer status can be included in the IF Condition statements.
| Timer | Status | Description | Condition Statements |
| Timer Status of index N | Not Timeout | Identify if Timer status is Not Timeout | continue to be TRUE when the status matches the criteria |
| Timeout | Identify if Timer status is Timeout | ||
| Stop | Identify if Timer status is Stop |
Users can change the Timer status in the Action statement.
| Timer | Action | Description | Execution Type |
| Timer index N | Start | Start or Restart the Timer | One Time |
| Reset | Stop and reset the Timer | One Time | |
| Pause | Pause the running Timer | One Time | |
| Resume | Resume the stopped Timer | One Time |
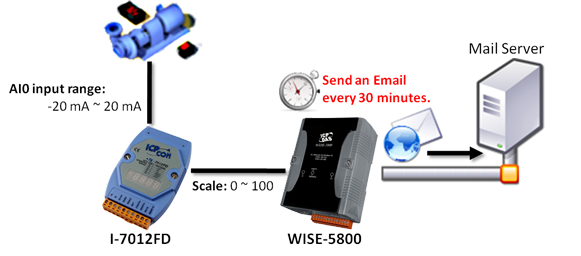
Timer Application Example
| Scenario | Example Document | ||||
Assume a WISE Controller is used in a device monitoring system. It sends out an Email to the related personnel every 30 minutes in real time to report related data regarding current device status such as device operating temperature. |
|
||||
| Graphic Illustration | |||||
 |
|||||
